Table of Contents
What Is Wood Finishing?
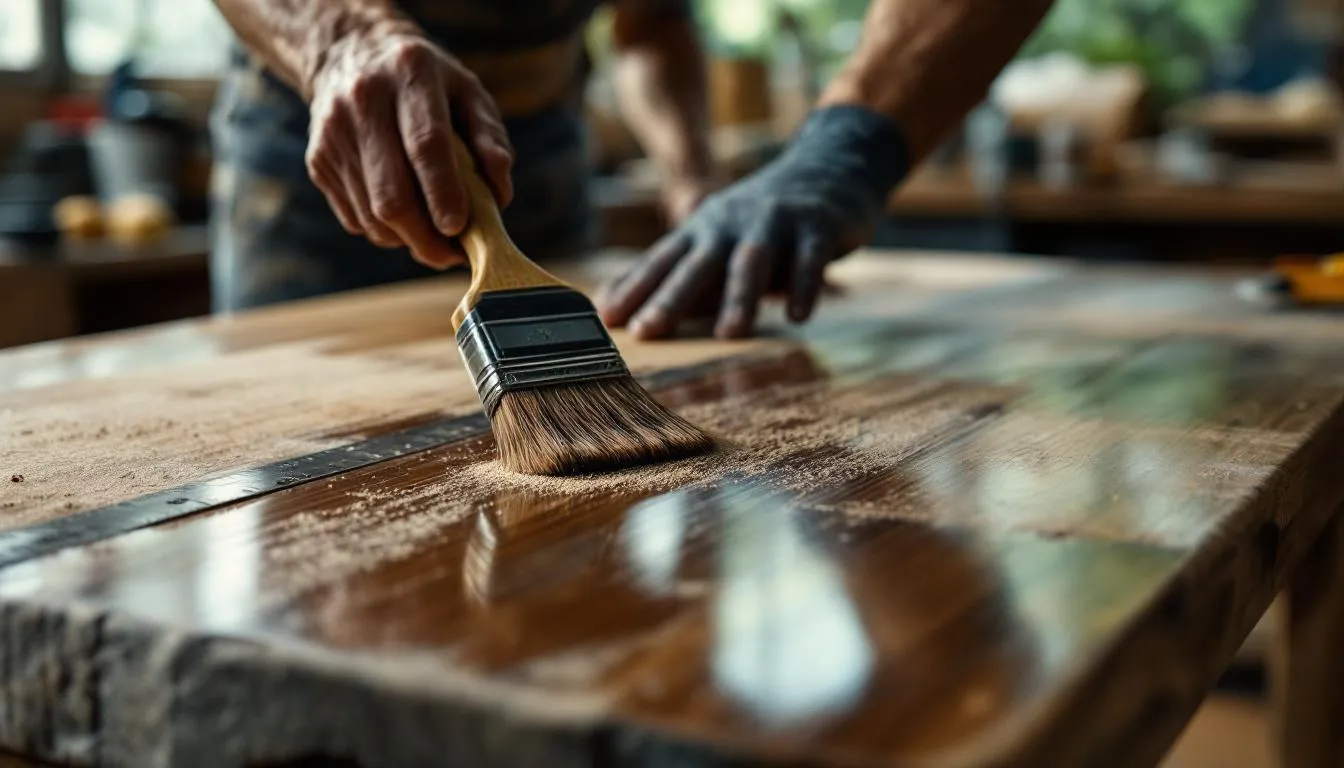
Wood finishing is the process of applying protective and decorative coatings to wood surfaces — the final step that transforms raw wood into something that resists moisture, wear, and time while looking its best. It’s arguably the most underappreciated skill in woodworking. You can build a flawless piece of furniture with perfect joinery, and a bad finish will make it look amateur.
A great finish on modest construction looks professional. The finish is what people see and touch.
Why Wood Needs Finishing
Unfinished wood is vulnerable. It absorbs moisture (which causes swelling, warping, and rot), stains easily (water rings, food, grease), scratches readily, and degrades under UV light (turns gray outdoors, fades indoors). A finish creates a barrier between the wood and these threats.
Beyond protection, finishing reveals wood’s beauty. Raw wood often looks dull and flat. Apply an oil or varnish, and the grain pops — figure, chatoyance (the shifting light effect in curly maple), and color depth all emerge dramatically. The finish doesn’t add beauty so much as unlock what’s already in the wood.
Surface Preparation
Finishing begins long before the first coat. Surface preparation — primarily sanding — determines 80% of the final result.
Sanding sequence — Start with the grit that removes existing defects (120 for rough surfaces, 150 for reasonably smooth ones). Progress through grits: 120, 150, 180, 220. Each grit removes the scratches left by the previous one. Skipping grits leaves visible scratches under the finish.
Always sand with the grain. Cross-grain scratches are invisible in raw wood and glaringly obvious under finish. This is the most common beginner mistake.
Raise the grain before applying water-based finishes. Wipe the sanded surface with a damp cloth, let it dry, then sand lightly with 220 grit. Water-based products will raise the grain otherwise, creating a rough surface under the first coat.
Remove dust completely between sanding and finishing. A tack cloth (slightly sticky cheesecloth) picks up fine dust. Compressed air blows it off but also spreads it around the shop. Vacuum first, then tack cloth.
The Major Finish Types
Oils
Tung oil and linseed oil — Penetrating finishes that soak into wood rather than sitting on top. They enhance grain and provide a natural, close-to-the-wood feel. Protection is modest — oils resist light moisture but not prolonged water exposure or heavy wear. Application is simple: wipe on, let soak, wipe off excess. Multiple coats build protection.
Danish oil — A blend of oil, varnish, and solvent that’s easier to apply than pure oil and provides slightly more protection. A favorite for furniture that you want to look natural and feel smooth without a plastic-like film.
Varnish and Polyurethane
Oil-based polyurethane — The most durable widely available finish. It builds a thick, protective film that resists water, chemicals, and abrasion. Downsides: slow drying (4-8 hours between coats), adds an amber tone that deepens over time, strong odor, and requires cleanup with mineral spirits. Excellent for floors, tabletops, and high-wear surfaces.
Water-based polyurethane — Dries faster (1-2 hours between coats), stays clear without yellowing, lower odor, and cleans up with water. Slightly less durable than oil-based and can raise grain on the first coat. The clarity makes it ideal for light woods (maple, ash, birch) where you don’t want amber warmth.
Spar varnish — Formulated for exterior use. Contains UV absorbers and remains flexible to accommodate wood movement from humidity changes. Used on outdoor furniture, boats, and front doors.
Lacquer
The professional furniture finisher’s choice. Lacquer dries extremely fast (minutes, not hours), builds to a beautiful, clear film, and can be rubbed out to a mirror-like gloss. It’s typically sprayed, which requires spray equipment and good ventilation. Lacquer is also available in brushing formulations that dry more slowly to allow leveling.
The drawback: lacquer uses volatile solvents and is extremely flammable. Professional shops use dedicated spray booths with explosion-proof ventilation. Not ideal for casual home use unless you spray outdoors.
Shellac
Made from lac bug secretions dissolved in alcohol — which sounds awful but produces a beautiful, warm finish. Shellac has been used for centuries and remains popular for its fast drying, easy repair (new coats dissolve into previous ones), and food-safe properties (it’s used to coat pharmaceutical pills and candy).
Shellac isn’t waterproof — a wet glass will leave a white ring — so it’s better for decorative pieces than kitchen tables. It also makes an excellent sealer under other finishes.
Staining
Stain changes wood color without providing protection. It’s applied before the protective finish coat.
Oil-based stains — Penetrate deeply, blend well, and provide even color. Longer working time allows blending on large surfaces. Common brands (Minwax, Varathane) are available at every hardware store.
Water-based stains — Dry faster, lower odor, easier cleanup. Can raise grain, so pre-raising is recommended. Color tends to sit more on the surface.
Gel stains — Thick consistency that sits on the surface rather than penetrating deeply. Excellent for blotch-prone woods (pine, cherry, birch) that absorb liquid stains unevenly. Also good for applying stain to vertical surfaces without dripping.
The critical staining tip: always test on scrap wood of the same species. Stain color on the can’s label and stain color on your specific piece of wood can differ dramatically.
Application Tips That Actually Matter
Thin coats are better than thick coats. Multiple thin coats build a more even, durable, and beautiful film than one or two heavy coats, which sag, drip, and take forever to cure.
Sand between coats — Lightly (320 grit or fine steel wool) to remove dust nibs and provide adhesion for the next coat. Don’t sand through to bare wood.
Work in clean conditions. Dust is the enemy of finishing. Wet finish is a dust magnet. Clean your workspace, let airborne dust settle, and don’t sweep the floor right before applying finish.
Temperature matters. Most finishes perform best between 60-80°F with moderate humidity. Cold slows drying and prevents proper curing. High humidity can cause blushing (a milky white appearance) in lacquer.
The finish is the last thing you do and the first thing everyone notices. Get it right and the whole piece sings. Rush it and everything that came before — the careful joinery, the wood selection, the design — gets lost behind a disappointing surface.
Frequently Asked Questions
What is the best finish for a dining table?
Polyurethane (oil-based for durability, water-based for clarity) or conversion varnish provides the best protection for dining tables, which face water, heat, food stains, and daily wear. Apply 3-4 coats with light sanding between coats. Oil finishes (tung oil, Danish oil) look beautiful but offer less protection and require periodic reapplication. Lacquer provides a professional look but is less durable than polyurethane for high-use surfaces.
Do you need to sand before applying finish?
Yes. Sanding creates a smooth surface and opens wood pores to accept stain and finish. Start with 120 grit to remove roughness and machine marks, progress to 150, then 180, and finish with 220 grit for most finishes. Going beyond 220 for oil-based finishes can actually impede absorption. Between finish coats, lightly sand with 320 grit or fine steel wool to provide tooth for the next coat. Always sand with the grain, never across it.
What is the difference between stain and finish?
Stain changes the color of wood but provides little or no protection. It penetrates into the wood fibers and alters their appearance. A finish (polyurethane, varnish, lacquer, oil) provides a protective coating that resists moisture, scratches, and wear. Most projects use stain first (if color change is desired), then a protective finish on top. Some products combine stain and finish in one application, though purists prefer separate steps for more control.
Further Reading
Cite this article
APA
WhatIs.site. (2025). What Is Wood Finishing?. Retrieved May 27, 2026, from https://whatis.site/wood-finishing MLA
"What Is Wood Finishing?." WhatIs.site, July 15, 2025, https://whatis.site/wood-finishing. Accessed May 27, 2026. Chicago
WhatIs.site. "What Is Wood Finishing?." Last modified May 12, 2026. https://whatis.site/wood-finishing. HTML
<a href="https://whatis.site/wood-finishing">What Is Wood Finishing?</a> — WhatIs.site Related Articles
What Is Woodworking?
Woodworking is the craft of building objects from wood using hand and power tools. Learn about joinery, essential tools, wood types, and beginner project ideas.
arts cultureWhat Is Wood Carving?
Wood carving is the art of shaping wood into objects using cutting tools. Learn about carving styles, essential tools, wood selection, and techniques for.
everyday conceptsWhat Is Whittling?
Whittling is the art of carving shapes from wood using a knife. Learn about techniques, wood choices, essential tools, safety tips, and beginner projects.